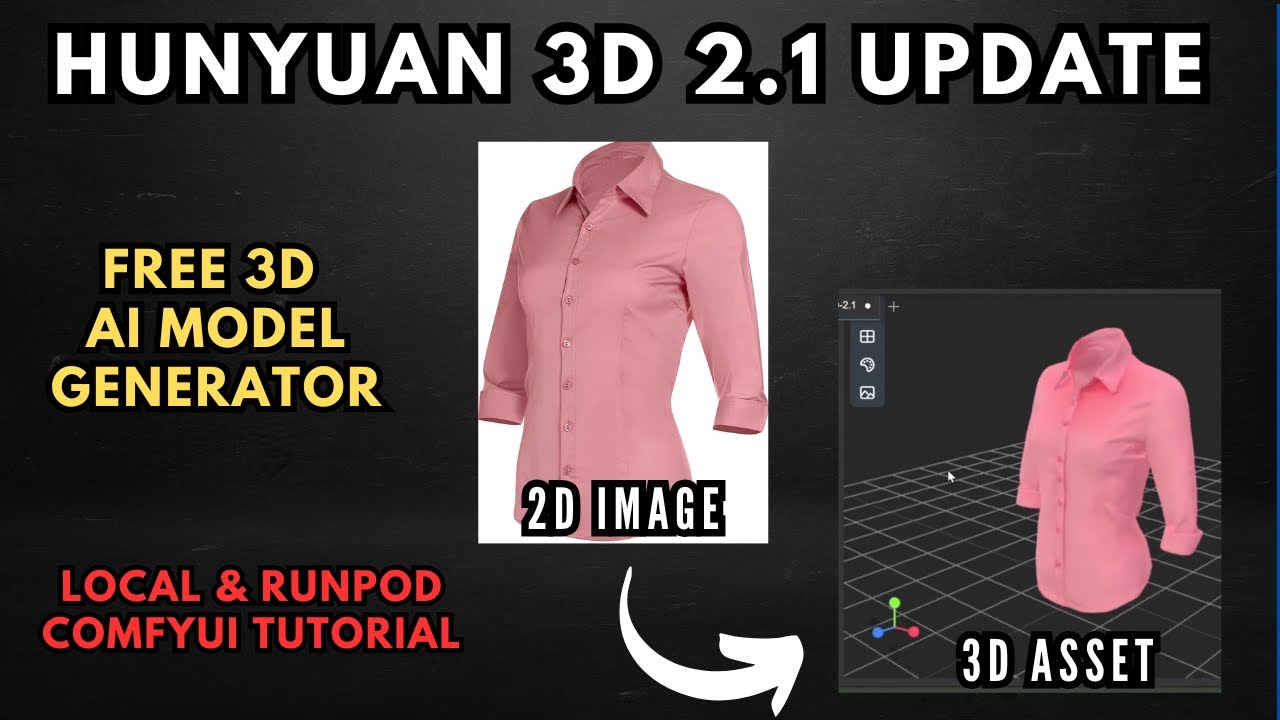
What's New in Hunyuan 3D 2.1
The Tencent Hunyuan team has been pushing 3D AI generation forward at a serious pace. Version 2.1 brings several headline improvements over the original 2.0 release:
Option A: Local Setup (Mesh Generation)
This covers the manual installation path for Windows users. A one-click installer for mesh generation is also available on The Local Lab Patreon.
Prerequisites
- ComfyUI installed (Windows portable version recommended)
- ComfyUI Manager installed
- Git installed on your system
1. Install the Custom Nodes
Open a terminal and navigate into your ComfyUI custom_nodes folder. Clone the Hunyuan 3D 2.1 custom node and any dependencies. Links are in the Resources section below.
If you're using the Windows portable version, navigate back to the root ComfyUI directory and run the dependency install commands shown in the video — these install all requirements for both the manager and the Hunyuan custom nodes into the embedded Python environment.
2. Download the Models from Hugging Face
- Shape Checkpoint — go to the Tencent Hunyuan 3D 2.1 page on Hugging Face → Files and Versions →
hunyuan3d-dit-v2-1/folder. Download the FP16 shape checkpoint model. - VAE Model — from the main Hunyuan 3D 2.1 directory on Hugging Face, go into the
vae/folder and download the VAE model file. - Place the Files — drag the shape model into
ComfyUI/models/diffusion_models/and the VAE model intoComfyUI/models/vae/.
3. Load the Workflow and Generate
- Download and Load the Workflow — download the workflow JSON (link in Resources below) and load it into ComfyUI. If any nodes glow red (missing), open ComfyUI Manager → Install Missing Nodes, install them, then restart.
- Verify Model Selection — check the model loader nodes — confirm your shape checkpoint and VAE are selected correctly in the dropdowns. The texturing section can be bypassed if you're running mesh-only locally.
- Upload Your Image and Generate — use the Load Image node to upload your reference image. For best results: single object or character, clearly defined features, plain background. Hit Queue to generate your 3D mesh.
Option B: RunPod (Full Pipeline with Texturing)
For the complete two-stage workflow including PBR texturing — or if you're on an AMD card or have no dedicated GPU — the RunPod template handles everything including the 20GB+ VRAM texturing stage.
- Open the RunPod Template — click the RunPod template link from the Resources section below. Create a RunPod account if needed.
- Select a GPU — choose a GPU with at least 24GB VRAM — an RTX 4090 gives the best performance for the price. Adjust container storage if needed (100GB default is sufficient).
- Deploy and Wait for Setup — click Deploy. The pod runs installation scripts automatically — this takes 10–15 minutes. Watch the logs; when storage hits ~31% capacity, installation is complete.
- Connect and Open ComfyUI — click Connect → JupyterLab for file access. Then go back to the Connect menu and click ComfyUI to open the interface. Load the workflow file and run the full shape + texture pipeline.
📦 Want to skip the setup?
The Local Lab offers pre-configured AI installer packages so you can get running in minutes, not hours.
Get the Installer →