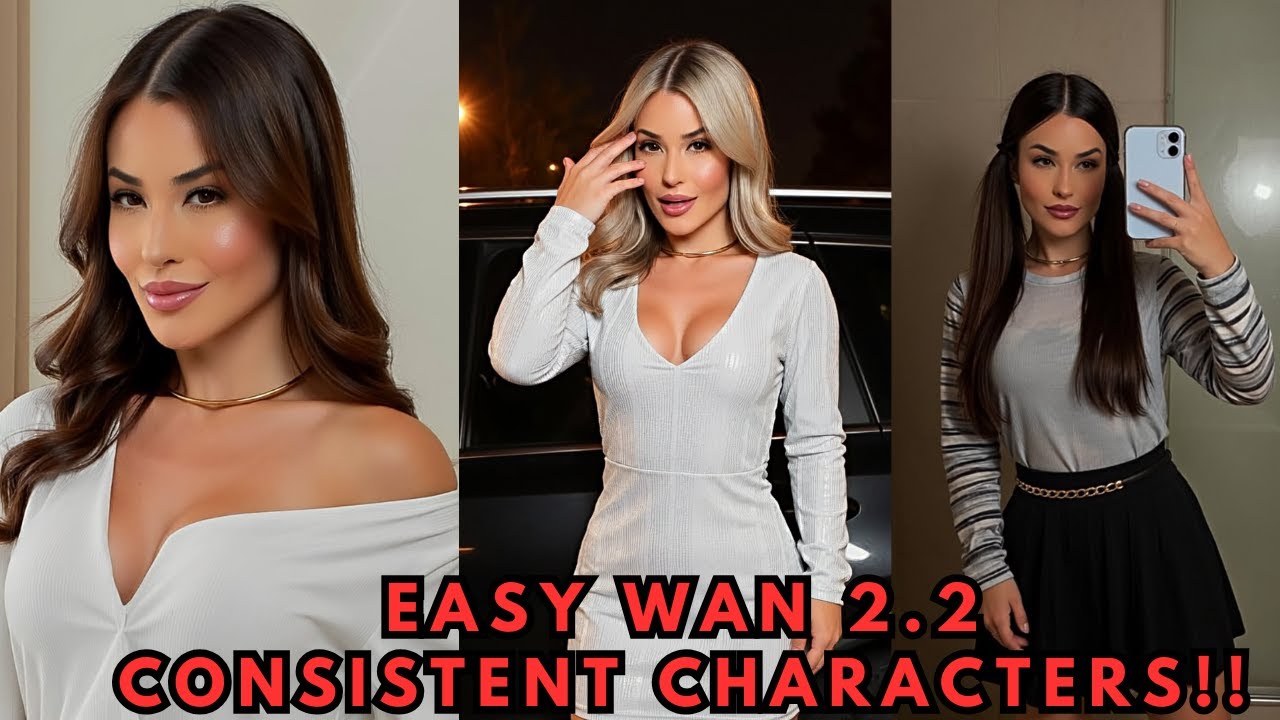
Getting a character to look exactly the same across different images — and even across videos — is one of the hardest consistency challenges in AI generation. In this guide we'll use AI Toolkit to train a character LoRA specifically for the WAN 2.2 models, giving you reusable, reliable characters you can drop into any workflow.
What Is AI Toolkit?
AI Toolkit is an open-source LoRA training framework that makes it straightforward to train custom LoRA models that influence generation toward a specific style or character. It has first-class support for the latest WAN 2.2 models, which means a character LoRA you train here will work for both still image generation and video clips.
Option A — Local Install (One-Click)
If you have 24 GB+ of VRAM locally, GitHub user Tavers1 provides a one-click Windows installer for AI Toolkit:
- Go to the AI Toolkit Easy Install GitHub repository.
- Navigate to the Releases page and download the ZIP file.
- Extract the ZIP into its own folder.
- Double-click the
.batfile — it handles all dependencies automatically.
Option B — RunPod (Recommended for Most)
For everyone else, RunPod provides on-demand GPU access without a large upfront investment.
-
Select a GPU pod. Sign in to RunPod, open the Pods submenu, and select a GPU. The RTX 5090 (32 GB) is ideal for WAN 2.2 LoRA training.
-
Choose the template. Click Change Template and search for Oris AI Toolkit Official Community. Select it, then click Deploy.
-
Open the UI. Once the HTTP service port turns green, click it. If prompted for a password, enter
password.
Step 1 — Prepare Your Dataset
A good dataset is the foundation of a good LoRA. For WAN 2.2 character training:
- Use at least 10 high-resolution images of your character.
- Include a variety of poses, angles, and settings — the more diverse, the better the AI's understanding.
- Images should clearly show the character's face, hair, and defining features.
Once your images are ready:
- In the AI Toolkit UI, navigate to the Datasets tab.
- Click New Dataset and give it a name.
- Drag and drop your images into the upload field.
Adding Captions
For character LoRAs, you don't need elaborate per-image captions. A single, unique trigger word applied to all images works perfectly — this is the word you'll use later in prompts to activate the character.
sarah_taylor — short, unique, and unlikely to conflict with anything in the model's base training data.
Step 2 — Configure the Training Job
Navigate to the New Job menu in AI Toolkit. Here are the key settings:
| Setting | Recommended Value | Notes |
|---|---|---|
| LoRA file name | Your character name | This becomes the output filename |
| Trigger word | Same as dataset captions | Must match exactly |
| Model architecture | wan2.2_14b (normal) |
Works for image + video generation |
| Low VRAM | ✅ Checked | Prevents OOM errors during training |
| Noise model | Low-noise only (recommended) | Training both works but takes longer; low-noise gives stable results |
| Training steps | 2500–2750 | Default 3000 can overfit; 2500–2750 often gives cleaner results |
Step 3 — Set Up Sample Image Generation
AI Toolkit can generate test images at different points during training so you can monitor progress visually.
- Set Number of frames to
1(still image samples). - Add your trigger word to the sample prompts to ensure the LoRA is activated during tests.
- You can use the default prompts or write custom ones featuring your character in different scenarios.
Step 4 — Start Training
- Click Create Job to save your configuration.
- Click the Play button in the top menu bar to start training. AI Toolkit will download the required WAN 2.2 models and then begin.
- Monitor the Samples tab — test images are generated at regular intervals, giving you a visual sense of how well the LoRA is learning your character.
Step 5 — Download and Use Your LoRA
AI Toolkit saves checkpoint files at regular intervals during training. Once you're happy with a checkpoint:
- Open the Checkpoints panel and download your preferred checkpoint (the final one or whichever looked best in samples).
- Place the
.safetensorsLoRA file into your ComfyUImodels/loras/folder or your Forge UImodels/Lora/folder. - In your workflow, load the LoRA and use your trigger word in the prompt to activate the character.
The LoRA works for both still images and video clips with WAN 2.2, so once trained you can generate your character in any scene, pose, or motion sequence.
Tips for Better Results
- Dataset diversity matters most. Varied backgrounds, lighting, and poses produce more robust character LoRAs than many similar images.
- Unique trigger words prevent bleed. Avoid common words that already appear heavily in the model's training data.
- Test early checkpoints. Download and test a mid-training checkpoint (e.g., step 1500) before waiting for completion — sometimes earlier checkpoints are more versatile.
- Low-noise only is faster. Training on both high-noise and low-noise models doubles training time with limited benefit for most character LoRAs.
📦 Want to skip the setup?
The Local Lab offers pre-configured AI installer packages so you can get running in minutes, not hours.
Get the Installer →